RFID Meets Rhythm: a DIY game console for music-based play
Hi! My name is Lainey, and I love video games.
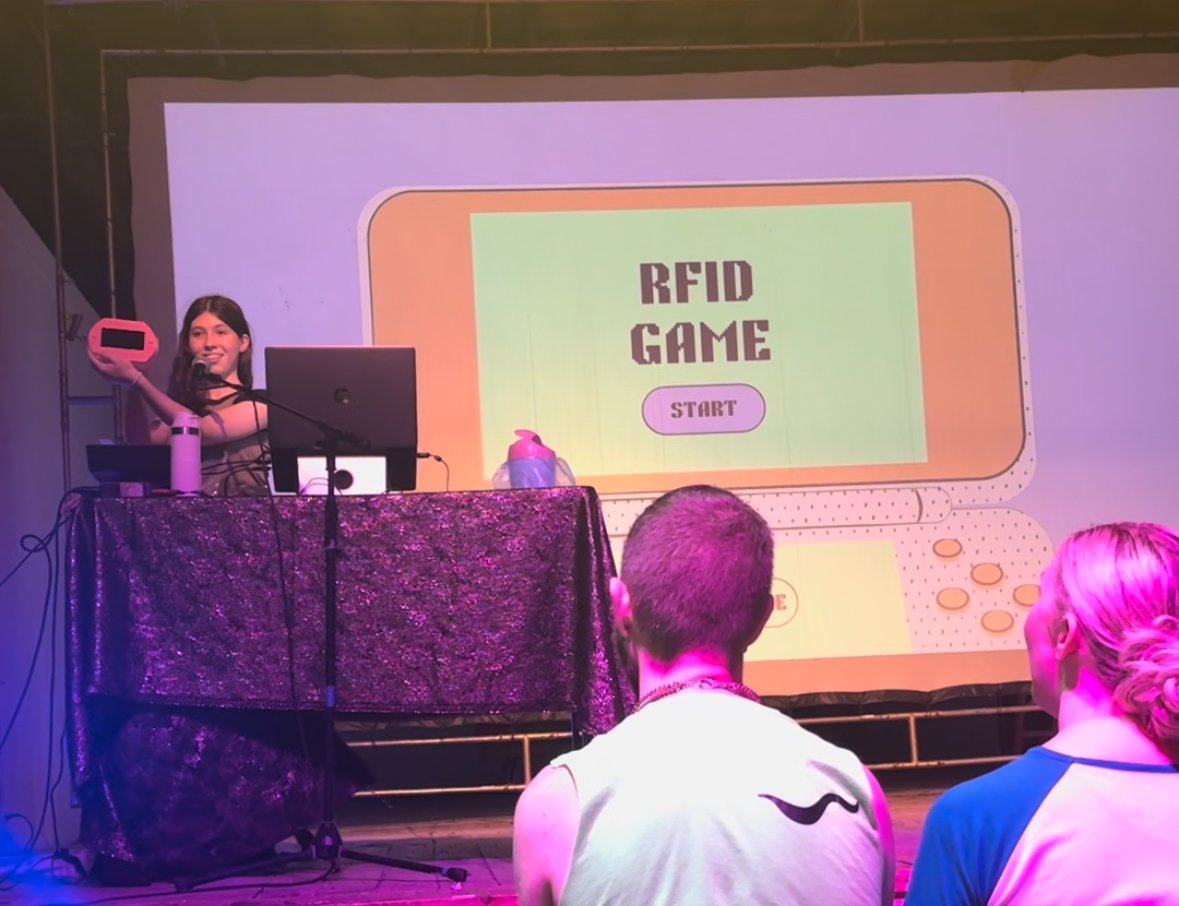
In 2023, I wanted to combine my love of electronics and game design into one project, and this is it!
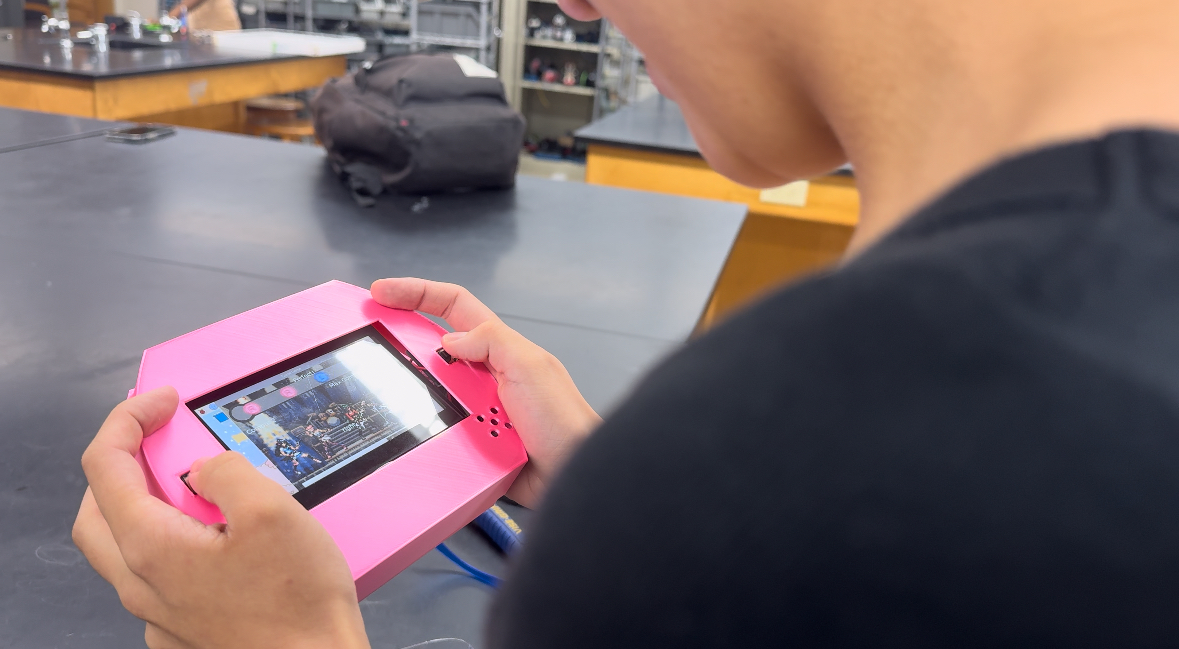
I spent a year building this rhythm game with dedicated hardware. I hope you enjoy hearing about my journey with this project!
Here is all of the code for this project if you want to take a look:
https://github.com/adelainerose/projectsGame
If you want to see any more information about the project, you can find another article about it on my “Press” page.
Game Design
Design Goals
My goal for this project was to build a cute rhythm game about a punk rock girl band.
Inspiration
Although I researched many different popular rhythm games (Project: Sekai, Love Live!, Hi-Fi Rush, Parappa the Rapper, and Persona 5: Dancing in Starlight), my main inspiration came from the Japanese rhythm arcade game, Aikatsu!

The most interesting part of Aikatsu! is that the player uses physical cards to modify their gameplay. Players can collect cards which contain different items of clothing. At the beginning of the game, the player scans their cards in the arcade machine, and the cards appropriately dress the virtual player character. Different outfits can unlock different special powers during the game!

I also wanted an interesting physical element in my game console, so I decided to add RFID cards that the player can scan into the game to decide which member of the girl band they play as.
Difficulty
Through my research, I discovered that the most important part of building a rhythm game was creating a “flow state:” a level of difficulty that is not so easy that the player gets bored, but not so hard that the player gets frustrated. A state where the player is “locked in.” When I started coding my game, I focused on perfecting that difficulty level.
Win/Lose State
How do you “win” or “lose” a rhythm game? Some games have health bars that decrease when you miss a note, while others have scores that increase when you hit a note correctly. Should the song end when you reach a certain score, or should it just continue?
I decided to use one dynamic progress bar that increases when you hit a note correctly, but also decreases when you miss a note. The progress bar starts in the middle, and if it falls to zero, the game ends and the player loses. If the player makes it to the end of the song without fully depleting their progress bar, they win. But what if the player maxes out the progress bar before the song ends?
Turbo Mode
When the player maxes out the progress bar, they will enter “Turbo Mode,” which creates special visual and audio effects that indicate to the player that they are “winning.” My original ideas were to make the background different colors and make the character sprite extra happy. Taiko no Tatsujin has a similar mechanic, where excited characters pop up from the bottom of the screen when the player is doing especially well.

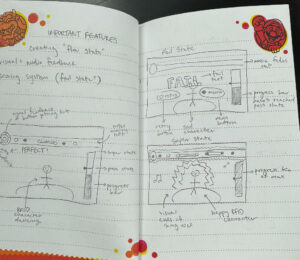
Here are some of my first sketches of the game, which include the normal game state, the fail state, and turbo mode:
Coding the Game
I Love LÖVE
Early on, I decided that I would run my game on Raspberry Pi 4, a small single board computer, so I knew that I couldn’t use a big game engine. So, I investigated 3 different frameworks: PyGame, RayLib, and LÖVE 2D.

I decided to use LÖVE 2D because the framework was very clean and simple, and there were a lot of user-made libraries (including ones that I could use to get the rhythm and GPIO aspects of my game working).
Centering Around the Beat
The first question I encountered when I started building my game was, “How do I track where the player is in the music?”
Timing is key in a rhythm game- one second can make the difference between perfectly hitting a note and completely missing it.
The most obvious way to track the music is to track the seconds (or frames) since the music started. If you know that the beat occurs every x seconds (or 60x frames), then you can check if the player’s note presses are at the correct second. There’s one big issue with this strategy, though: lag.

If the game lags, the seconds that you were counting won’t line up with the music anymore, so all of the “beats” will be offset. And, using a small computer like a Raspberry Pi guarantees lag every once in a while. So, how can you track the music without using seconds? The answer is to track the position in the song.
The player’s position in the song doesn’t change, even with lag. But how do you track it?
I used the LÖVEBPM library, which is a library that detects the BPM of a .mp3 or .ogg file and splits the song up into beats and sub-beats. So, instead of tracking seconds, I was able to track which beat or sub-beat the player was on.

Sub-beats are floats between 0 and 1. On the beat, the sub-beat becomes 0, and as the music gets closer to the next beat, the sub-beat gets closer to 1.
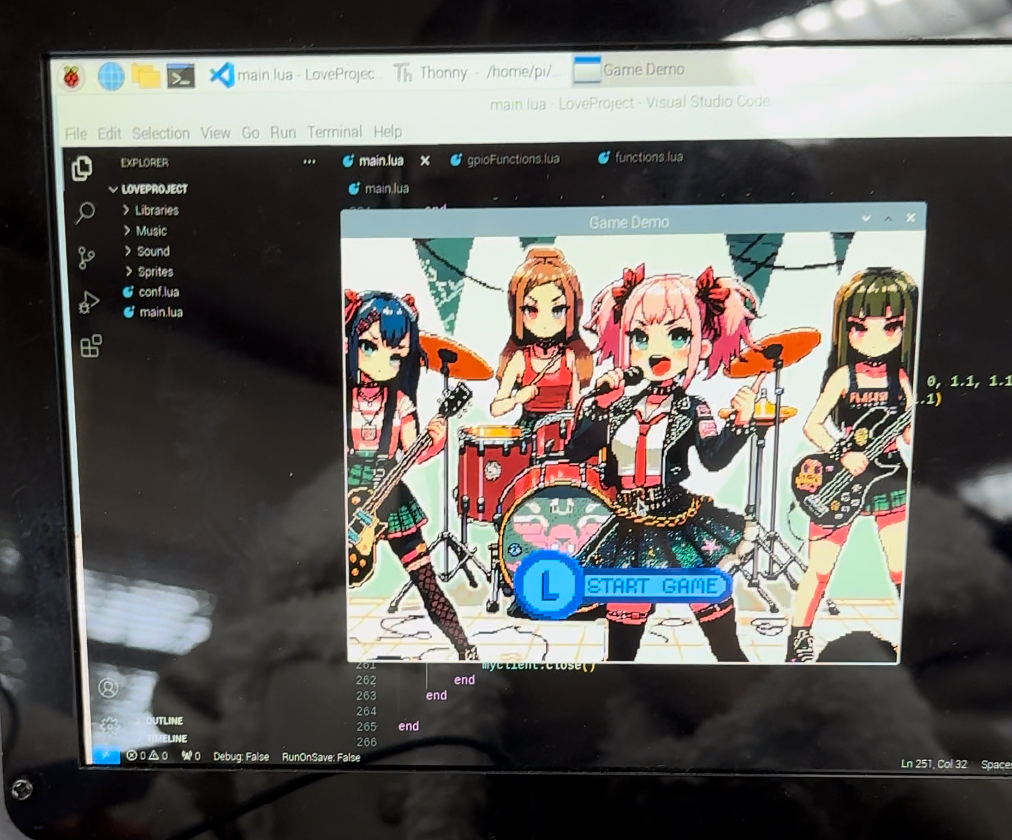
I started my project by using LÖVEBPM to create a simple “tap to the beat” demo, and then moved to animate some sprites to the beat.
Creating A Note Map
Tapping to the beat is great, but it wasn’t my end goal for my two-button rhythm game.
I wanted to build a note map: a string of notes that correspond with either the left or the right button. So, I wrote a function to do just that.
I first found the number of beats in the song I chose. Then, iterating through that number, I randomly assigned each beat to be “left,” “right,” or “none.” That way, each beat had a different button (or no button) assigned to it. I made “none” assignments less frequent as the song continued to make the game more challenging as it progressed.
This function will generate a different note map every time you play the game, making each play unique. And, the function will still work if I swap in any different .mp3 or .ogg file, meaning the possibilities for songs are endless.
function functions.generateNotes(i, rest, left)
    randomBeat = love.math.random(0,10)
        if randomBeat < rest then
            beatMap[i] = "rest"
        elseif randomBeat >= rest and randomBeat < left then
            beatMap[i] = "left"
        elseif randomBeat >= left then
            beatMap[i] = "right"
        end
    return beatMap[i]
 end

function functions.buildNoteMap(numBeats)
    beatMap = {}
    for i = 0, noteOffset, 1 do
        beatMap[i] = "rest"
    end
    for i = noteOffset, (numBeats/3), 1 do
        functions.generateNotes(i, 6, 7.5)
    end
    for i = (numBeats/3), (2*numBeats)/3, 1 do
        functions.generateNotes(i, 4, 7)
    end
    for i = ((2*numBeats)/3),numBeats,1 do
        functions.generateNotes(i, 3, 6.5)
    end
    return beatMap
end
Moving the Notes
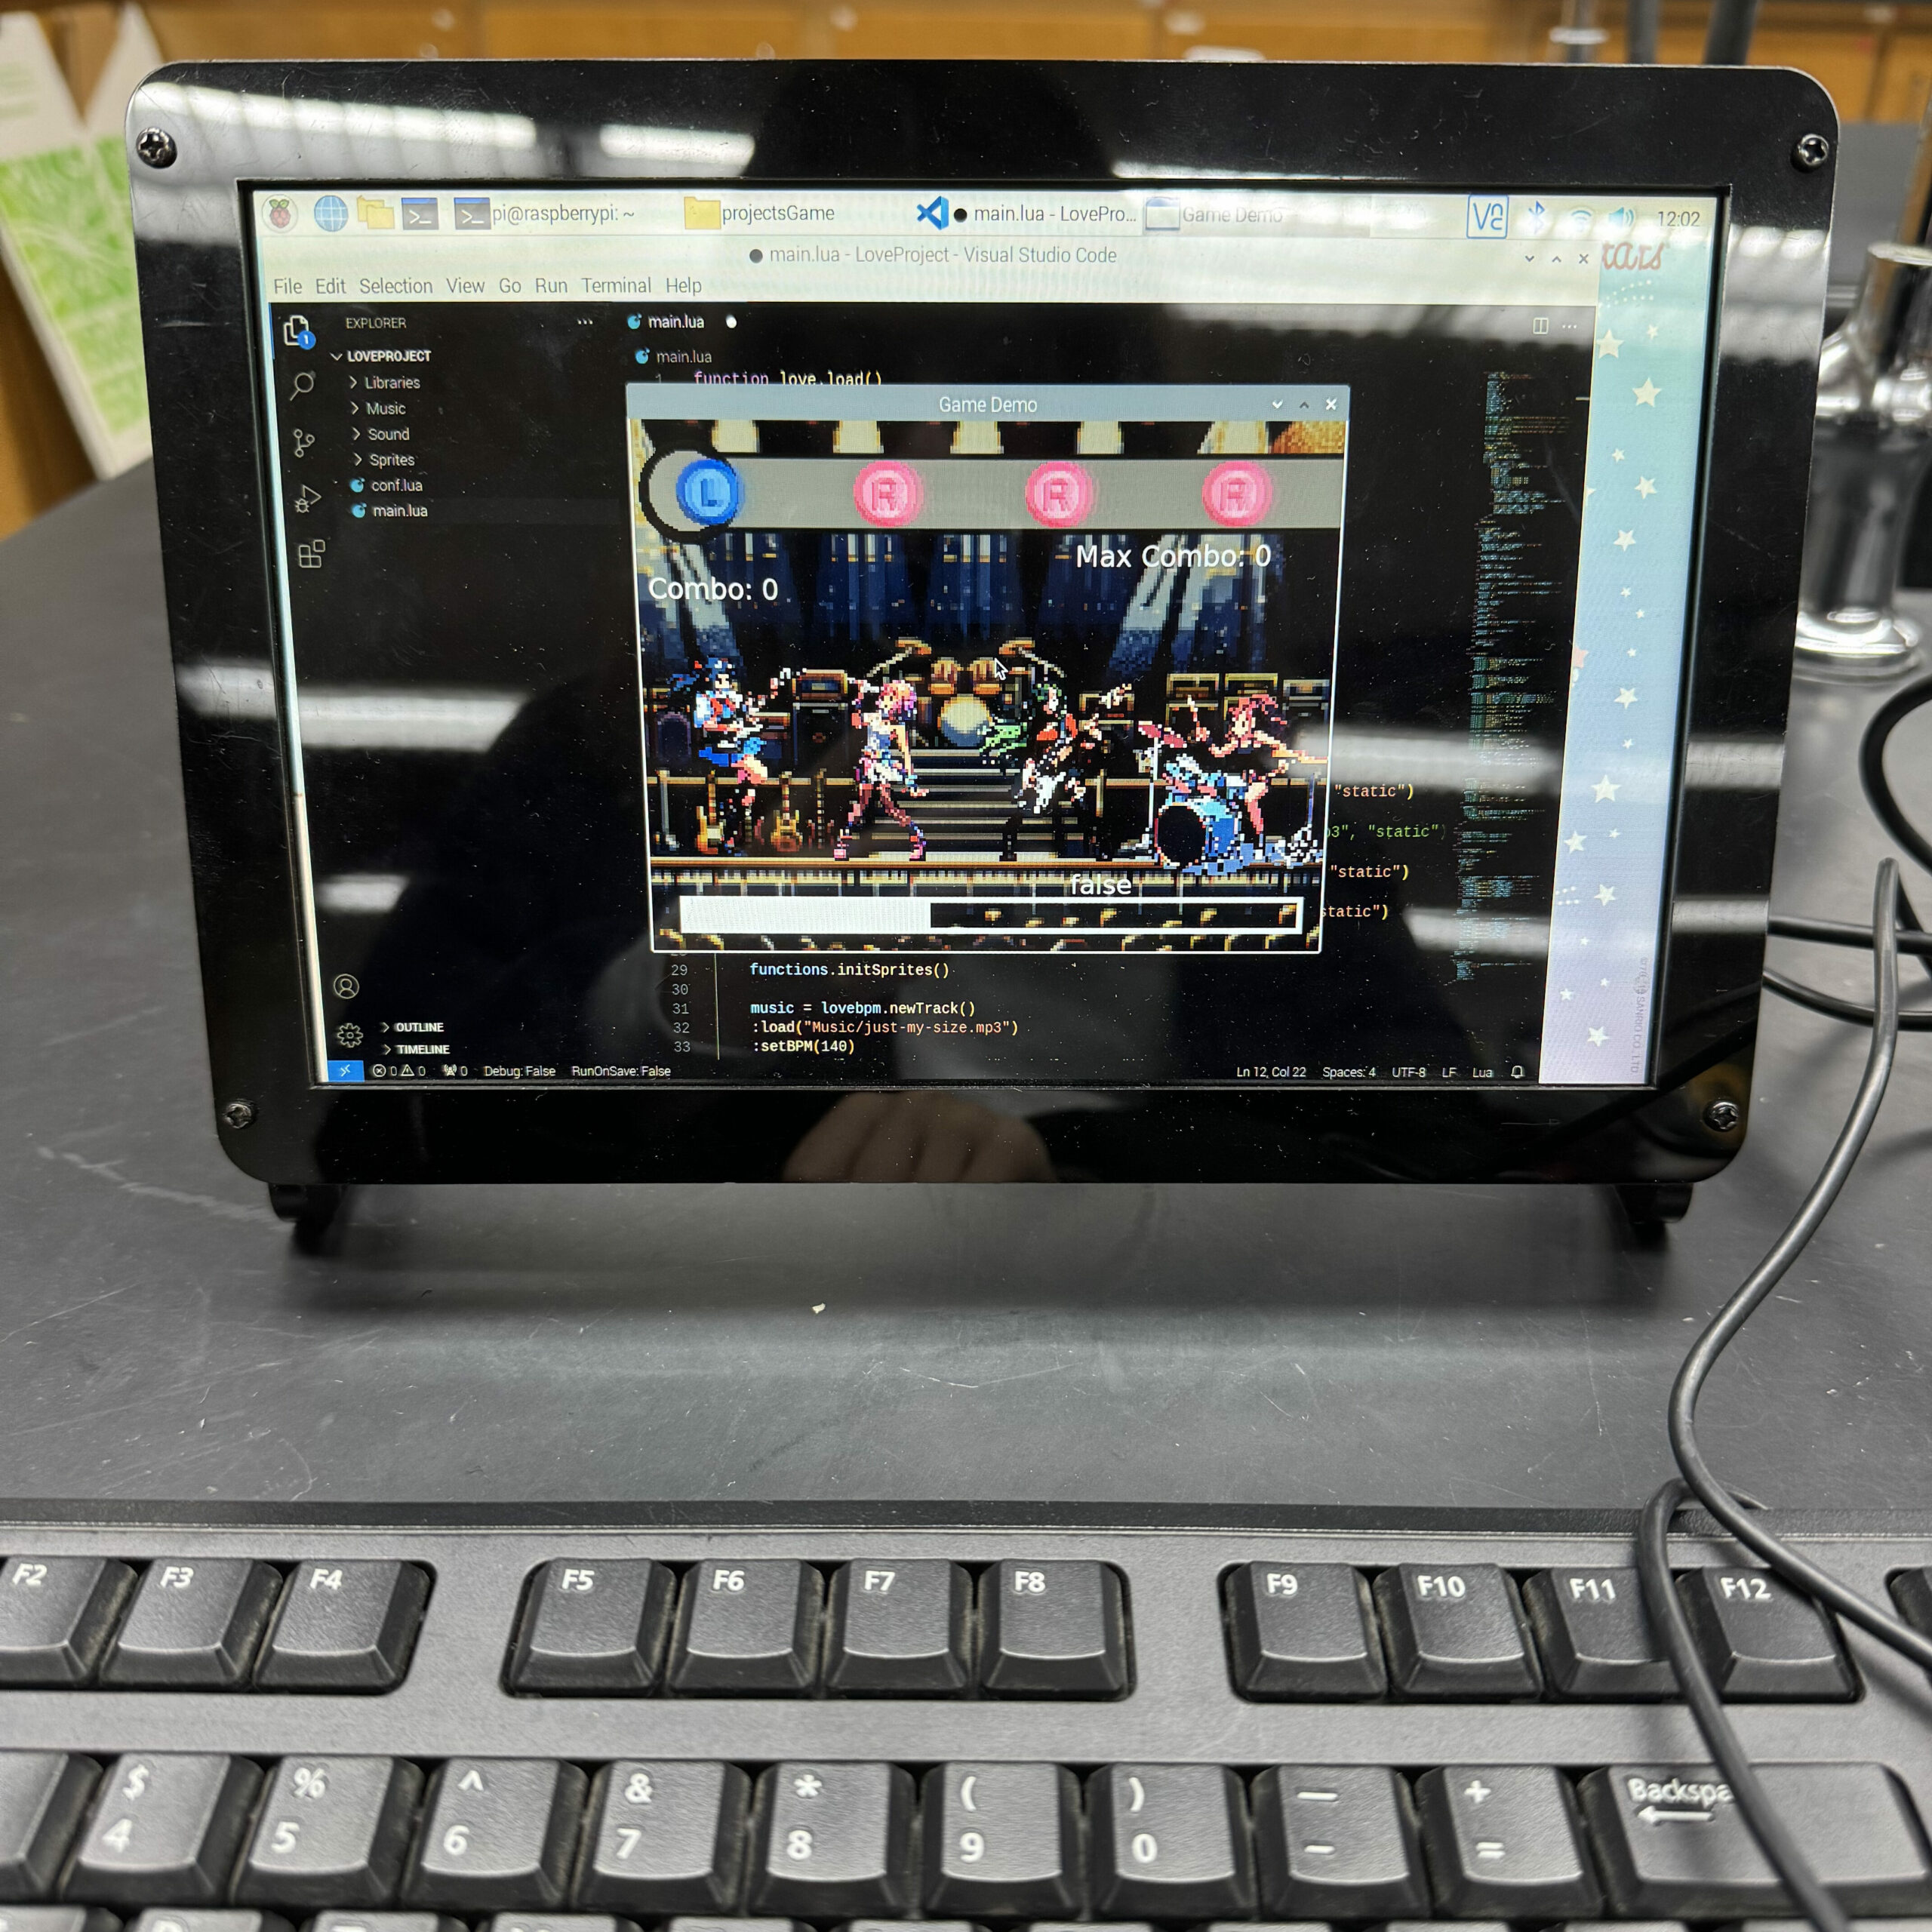
After building the note map generation system, I needed to create a way to convey to the player what buttons they were supposed to press. I chose to display 4 notes at a time, so I generated each note 4 beats in advance.
Scoring the Notes
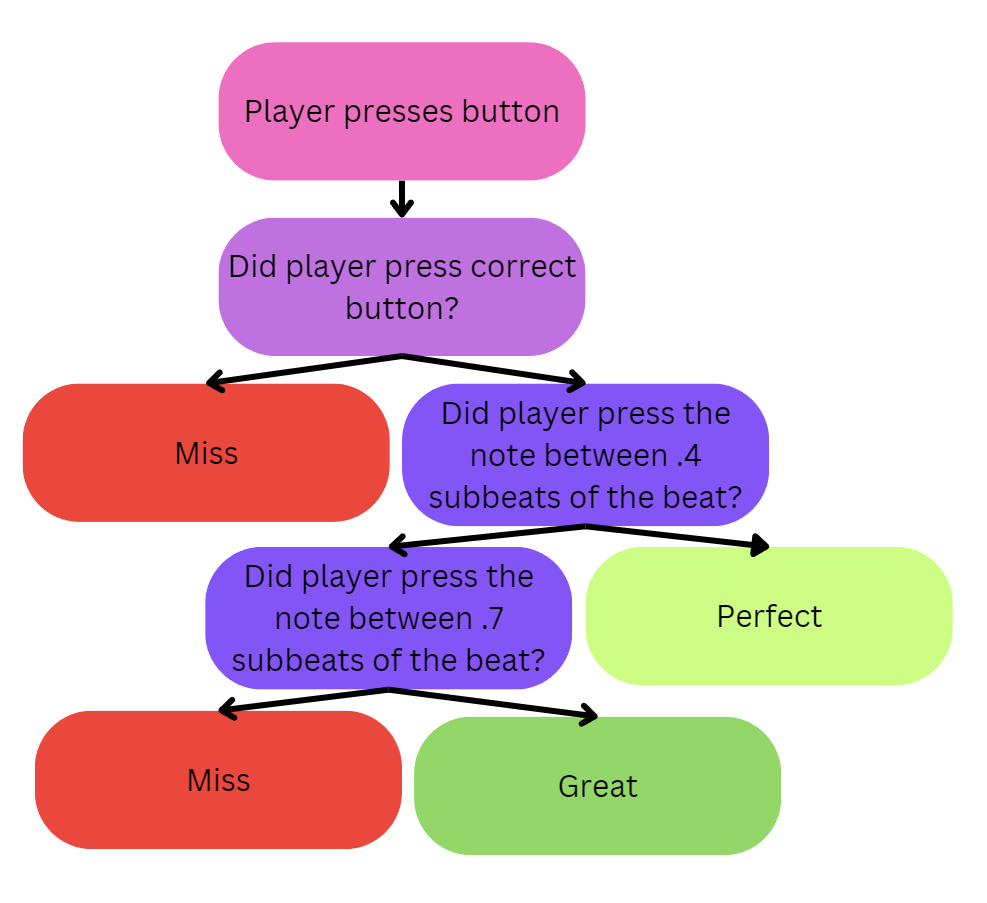
When I designed the game, I decided that I wanted to score the notes in four categories: “Perfect,” “Great,” and “Miss.”
Here was my logic:
- When the player presses a button, retrieve the current note from the note map.
- Check if the player pressed the correct button. If they didn’t, they receive a “Miss” score.
- If they pressed the right button, check the sub-beat. If the sub-beat is less than 0.2 or greater than 0.8 (meaning that it is very close to the beat), the player receives a “Perfect” score.
- If the sub-beat is less than 0.4 or greater than 0.7 (meaning that it is pretty close to the beat), the player receives a “Great” score.
- If the player doesn’t meet any of the conditions above, they receive a “Miss” score.
But wait. What if the player doesn’t press any buttons? They should get a “Miss” score. So, any time the player pressed a button, I set a BeatCounter variable to the current beat.
Every beat, I first checked if the current beat was a “rest” in the note map. If it was, I didn’t do anything. But if it wasn’t, I checked whether or not the BeatCounter variable was equal to current beat. If it wasn’t, then I set the score to “Miss.”
Electronics
What is RFID?
I mentioned that I wanted to use RFID to create a wireless character selection mechanic. But what even is RFID? RFID (Radio Frequency Identification) is a method of wireless data transfer.
The RFID cards have no batteries, just a chip holding a small amount of data. The antenna in the RFID reader produces a rapidly alternating current, which creates a magnetic field. When an RFID tag comes into the vicinity of this magnetic field, the magnetic field passes through the coil on the tag.
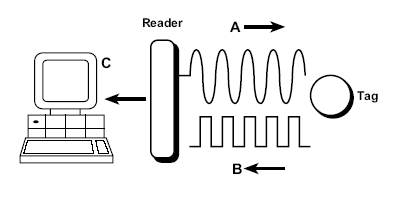
Because the reader creates a rapidly alternating current, the magnetic field it creates is also rapidly changing, and a change in a magnetic field induces an electromotive force. That electromotive force powers the tag, and the tag is then able to transmit the data on it to the reader by reflecting back the radio waves it receives but at different wavelengths, which is called backscatter modulation.
So, in my game, the player holds a tag up to a reader embedded in the console to select their character.
Console Components
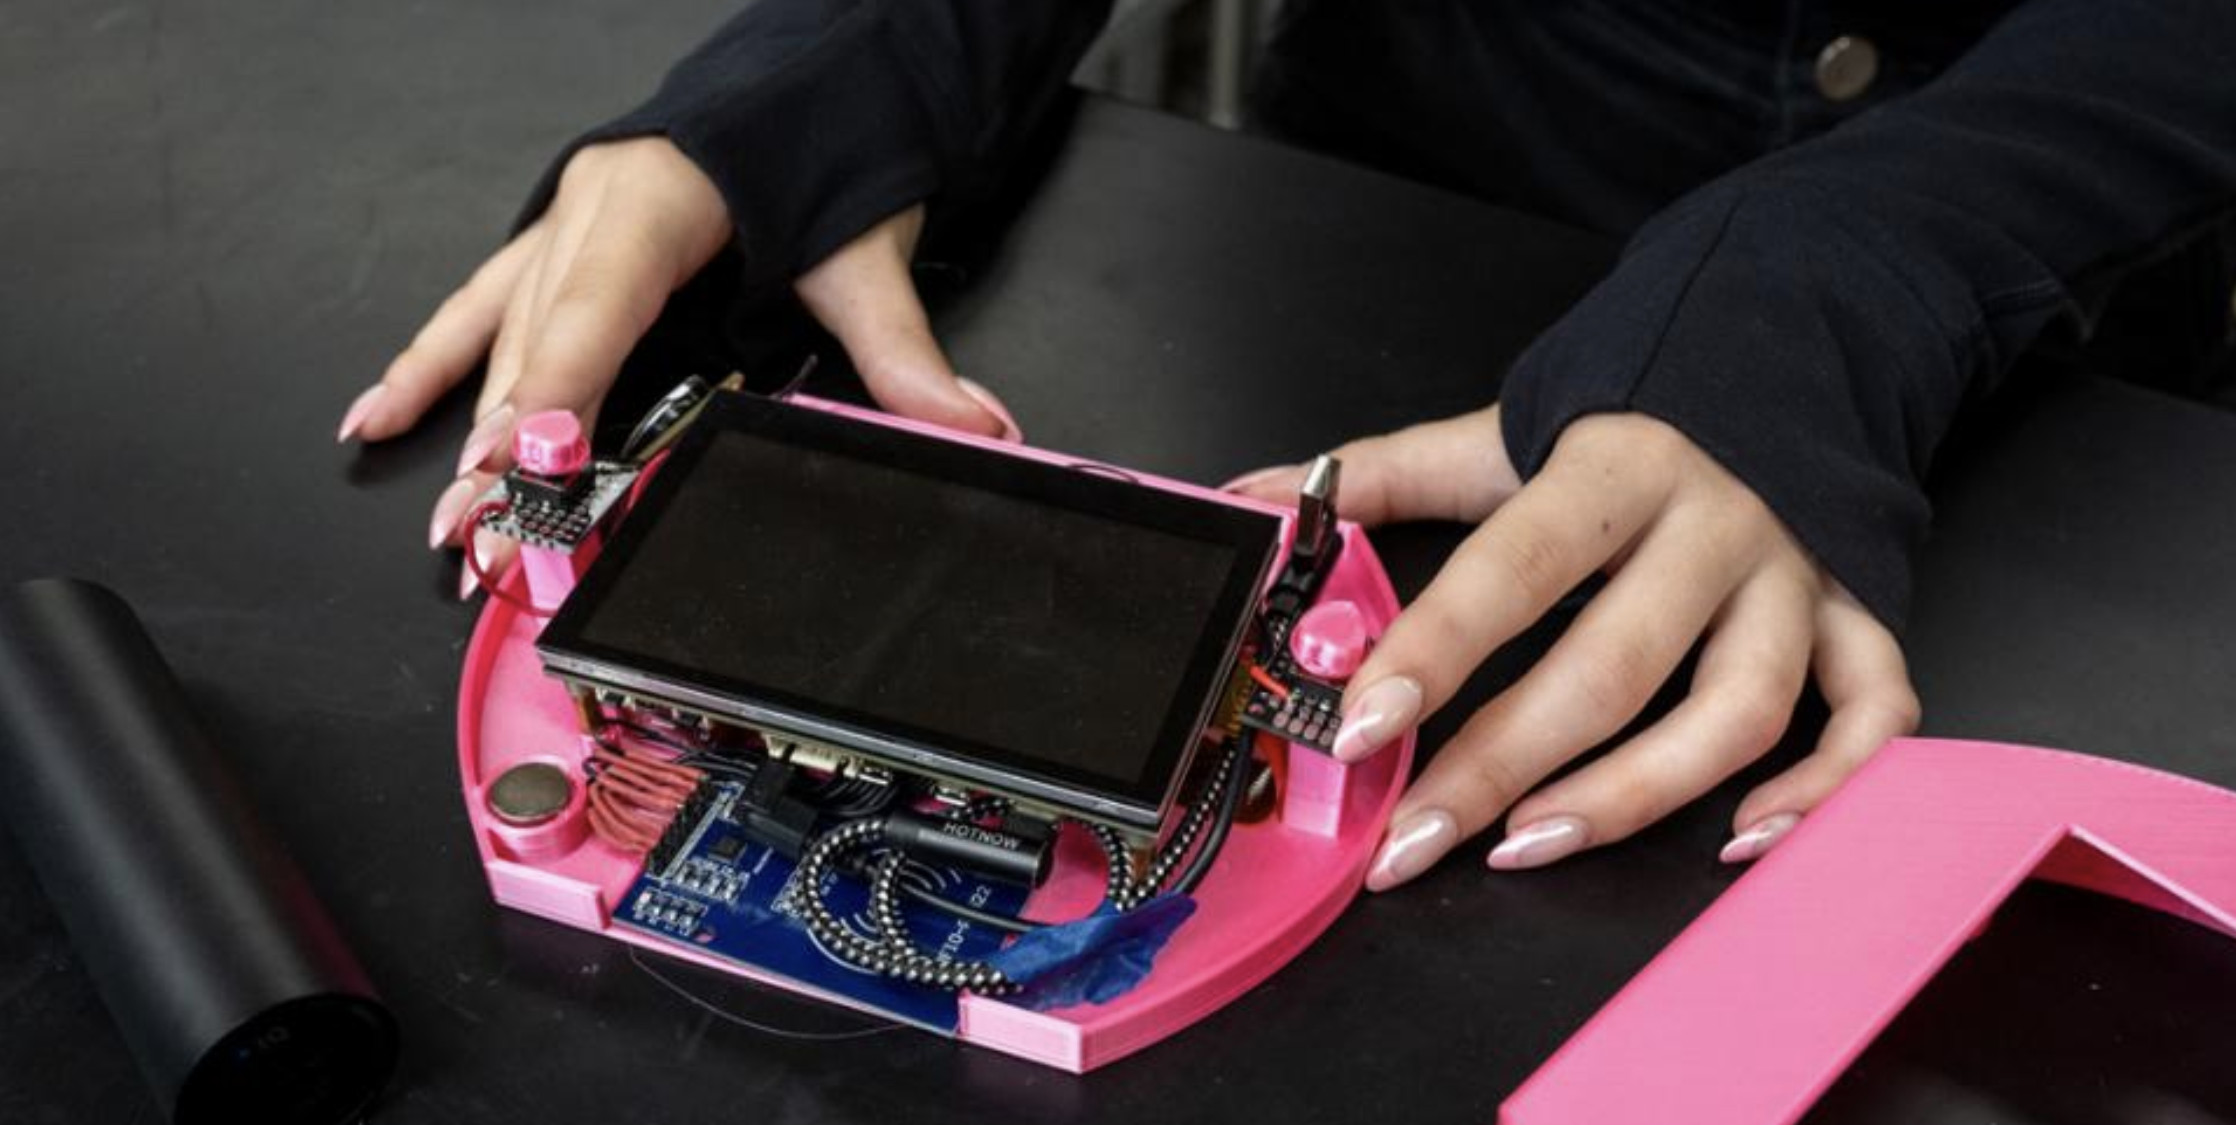
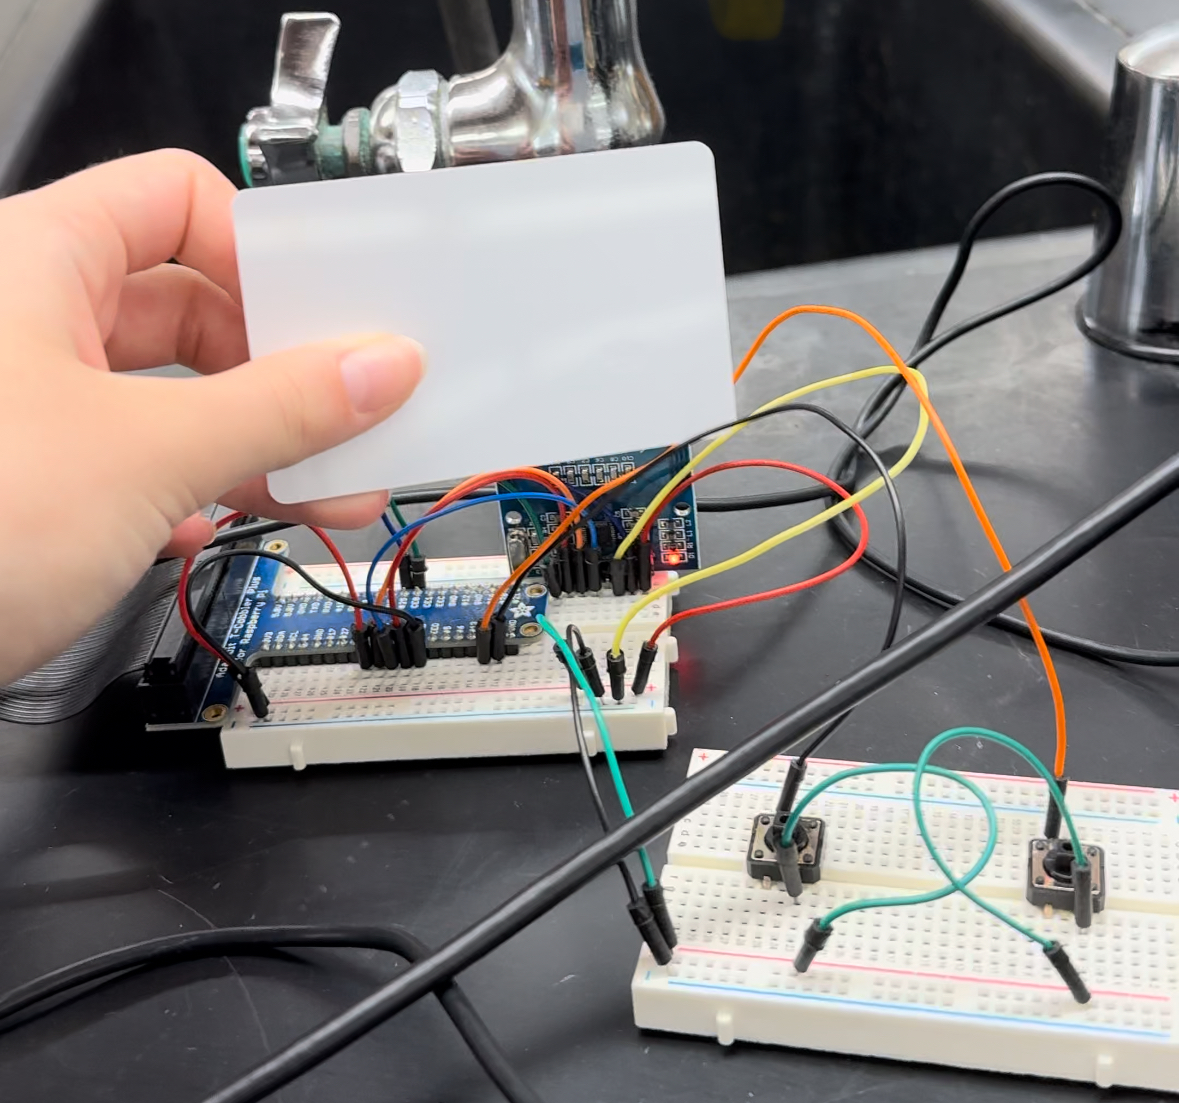
These are the electronic components I used to build my console:
- Raspberry Pi: I used a Raspberry Pi 4 to run my game because of its computing power.
- Screen: I used a BIG TREE TECH 800×480 Display as my screen. It was perfect because most screens attach to the Pi using the GPIO pins, but I was already using most of my pins for RFID and buttons. This display connects with ribbon cable.
- Buttons: I just used two simple push buttons for my buttons.
- Audio: I used an Adafruit Stemma Speaker because it was the smallest speaker I could find that also had a built in amplifier.
- Power Source: I used an Anker PowerCore as my power source because it was the power bank that fit most easily into my case. It also has an impressive battery life and is easily rechargeable.
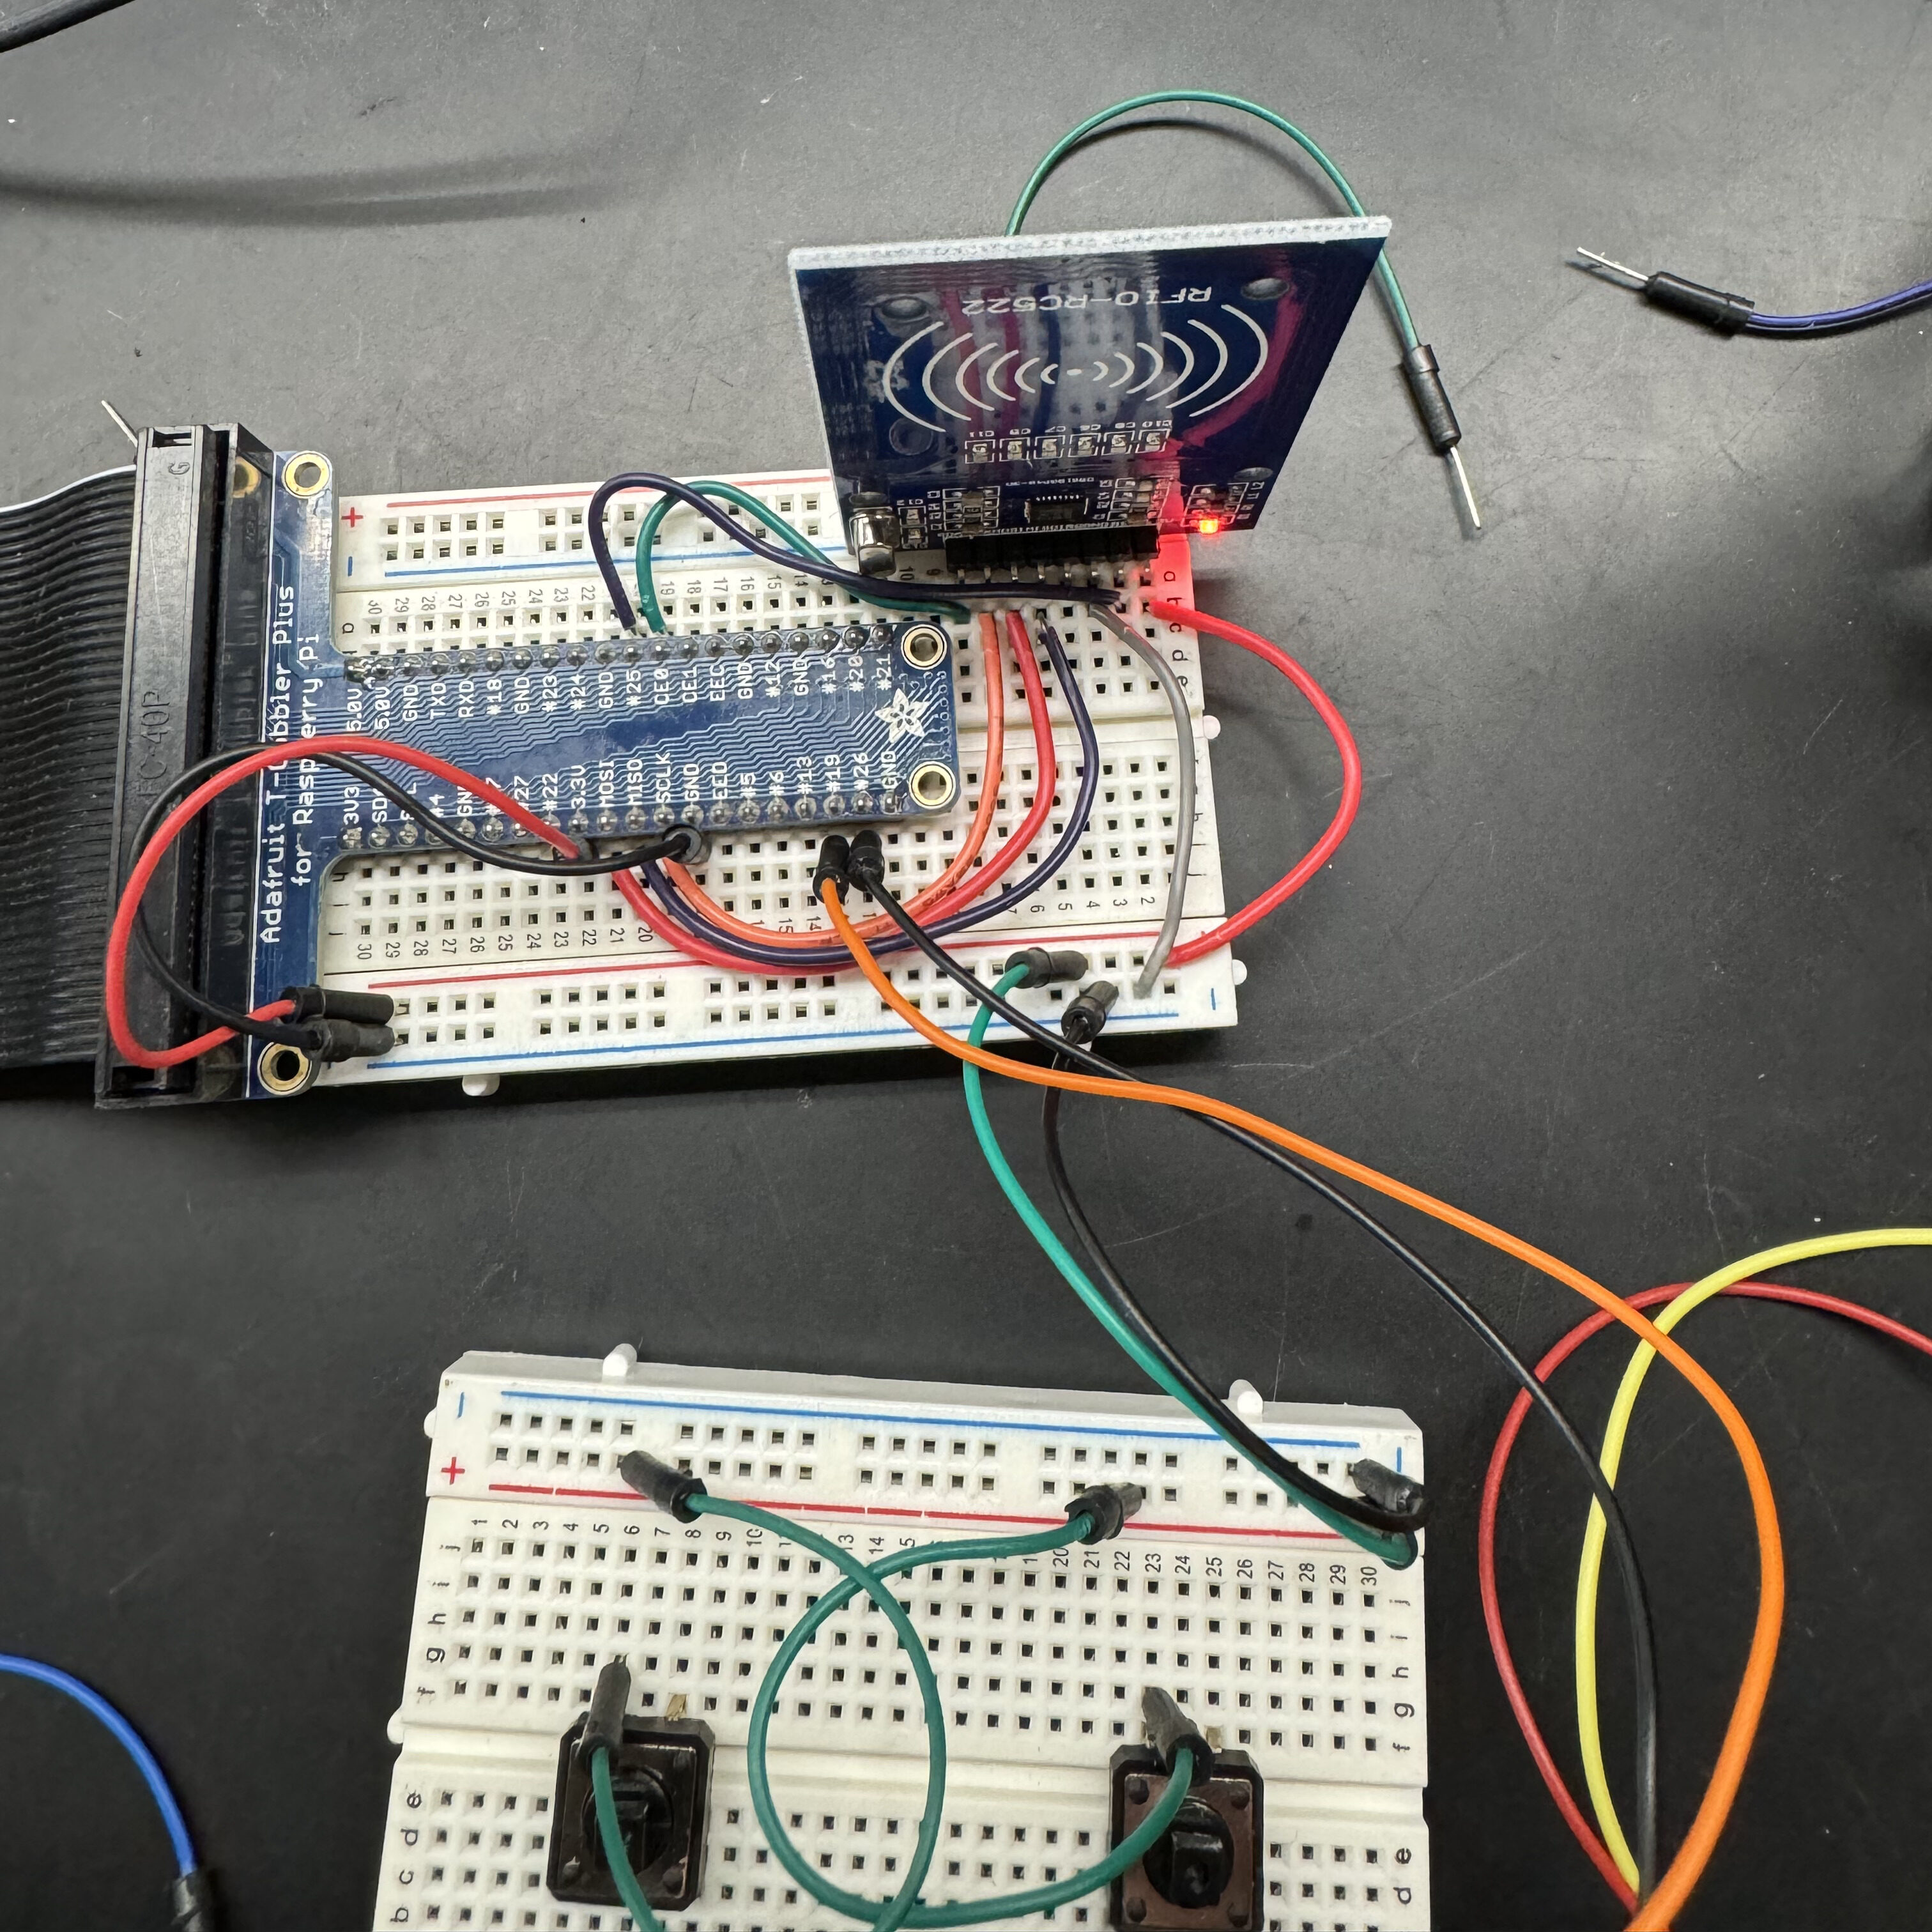
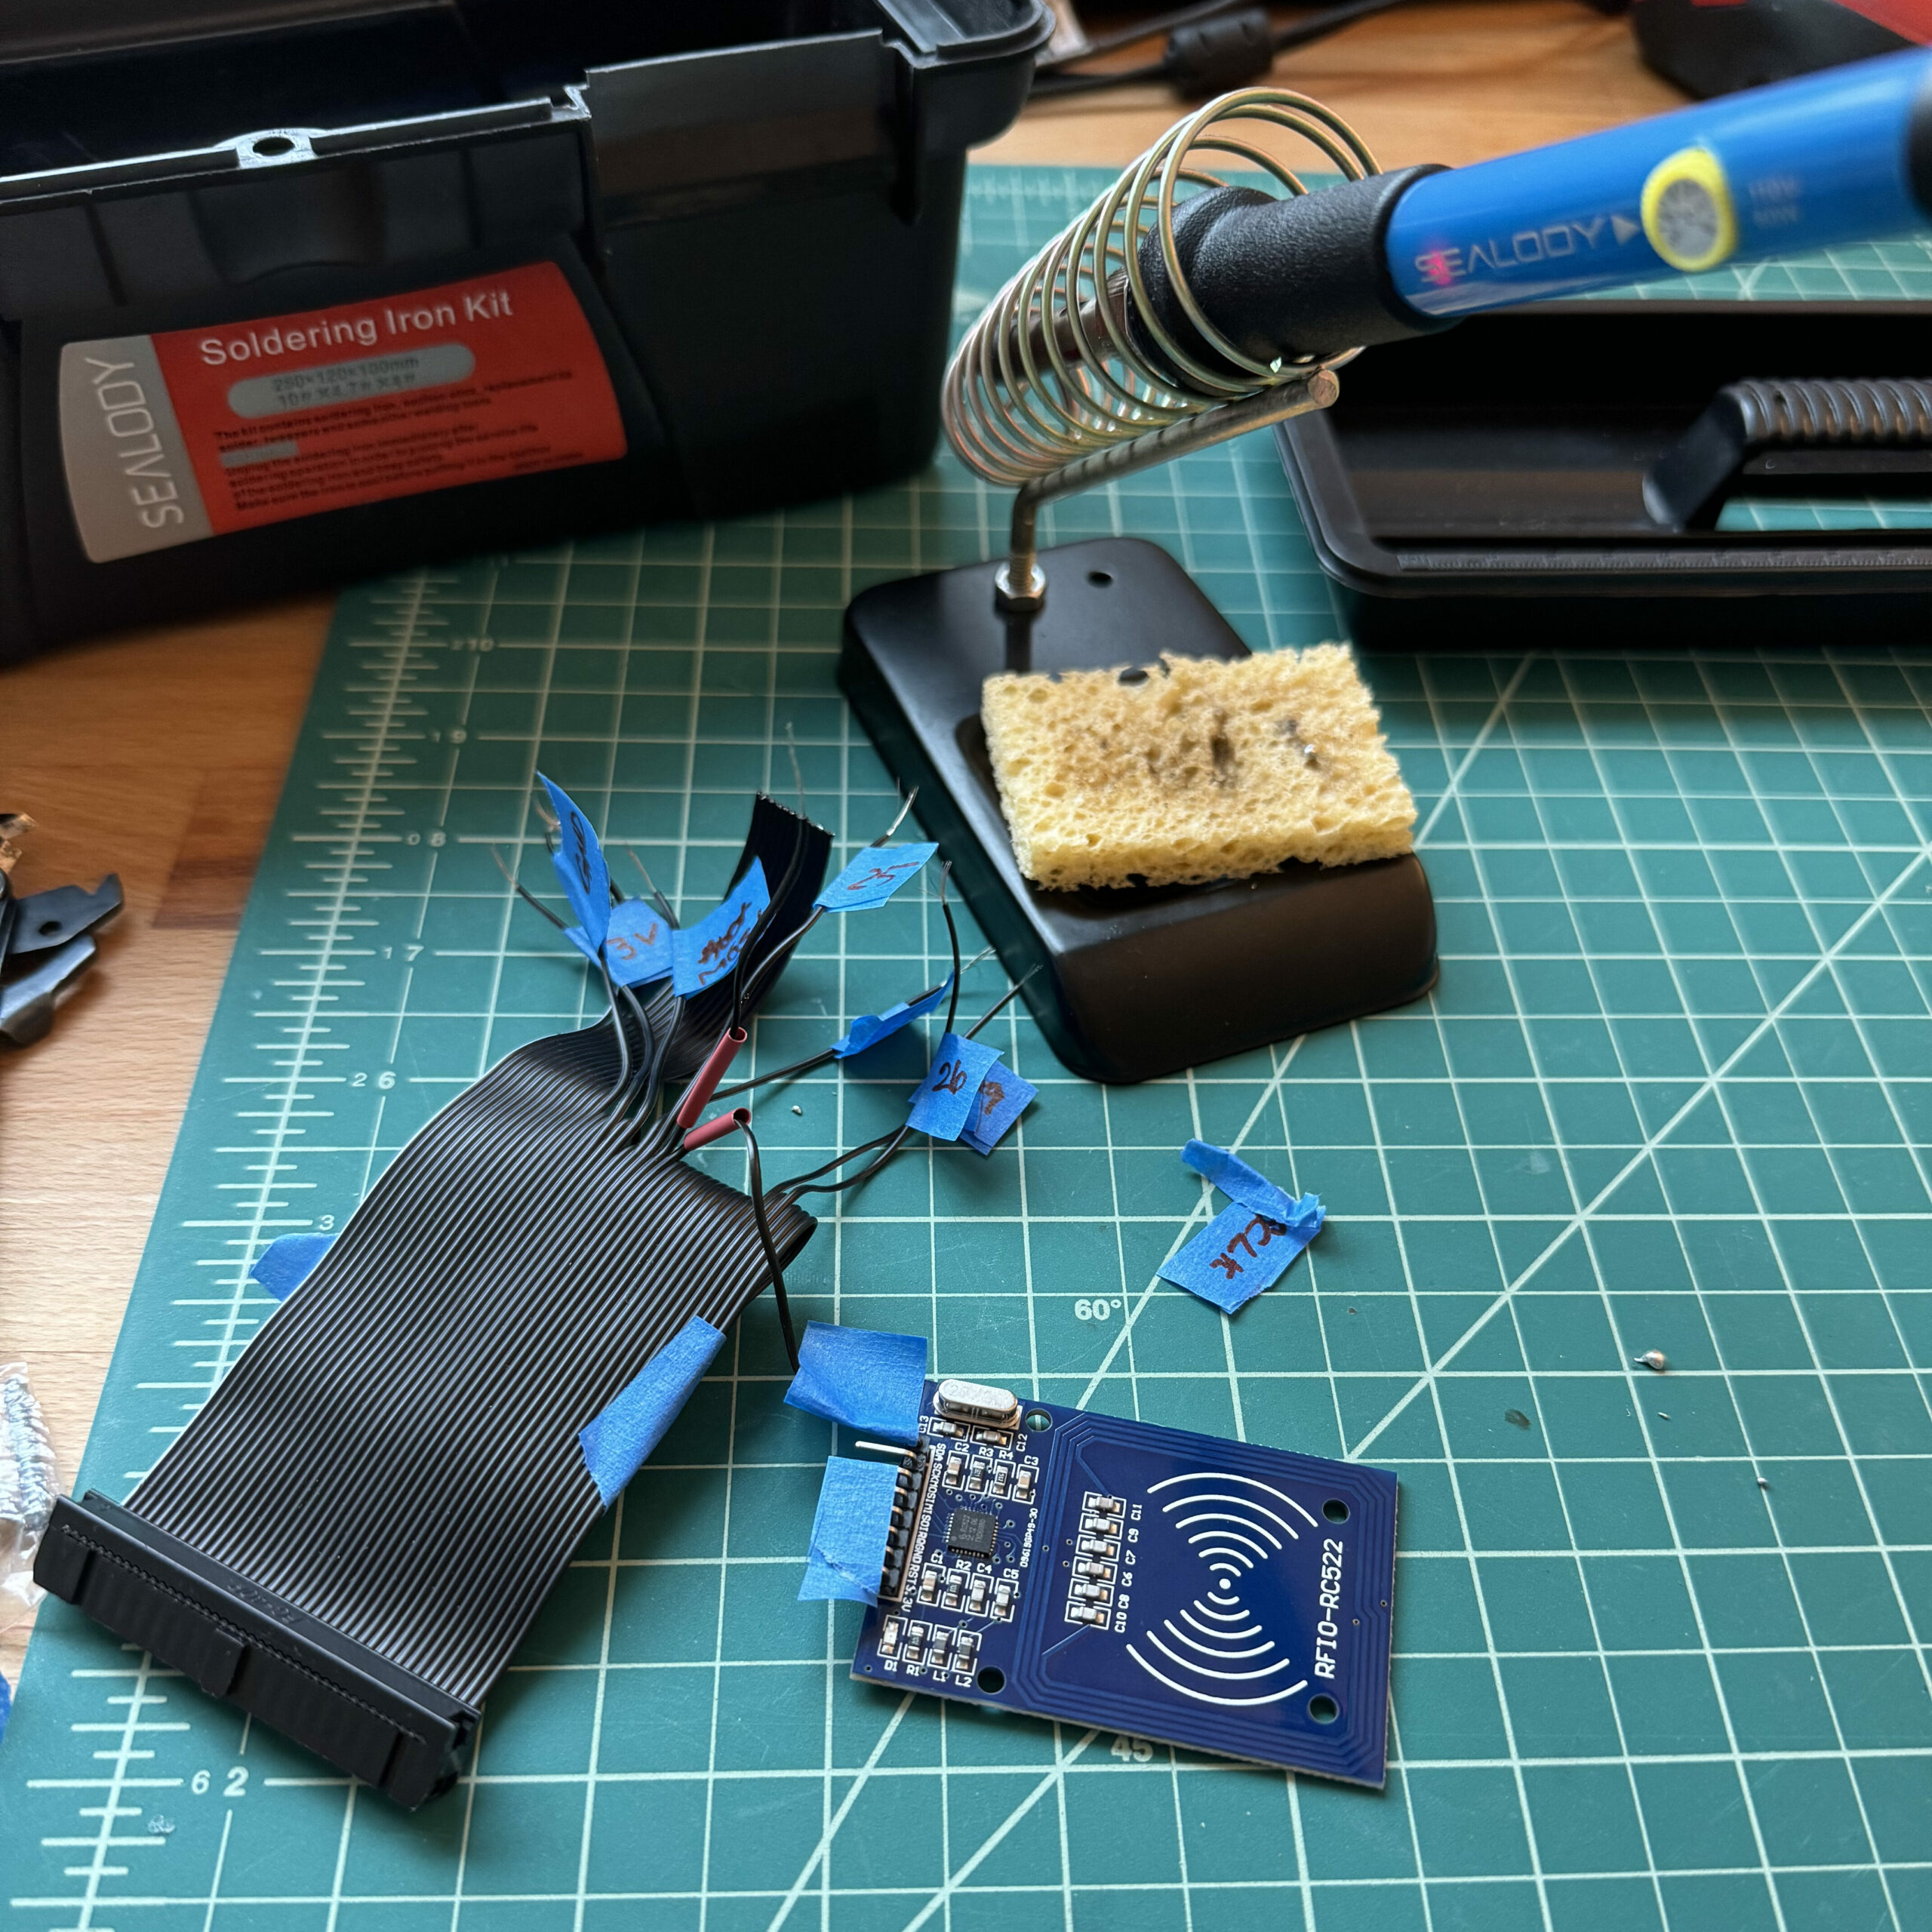
I started by assembling all of the electronic components on a breadboard, and after I was sure that I liked my wiring, I soldered my components onto a ribbon cable that attached to my Pi’s GPIO pins (Ground Power Input Output pins).
Coding the Console
GPIO
I used the lua-periphery library to access the GPIO pins in my code. I read the pins that I connected my buttons to in order to get their inputs! Then, I could use those inputs in my game code.
function gpioFunctions.readLeftButton(GPIO)
    local gpio_in = GPIO("/dev/gpiochip0", 19, "in")
    lbValue = gpio_in:read()
    gpio_in:close()
    return lbValue
end

function gpioFunctions.readRightButton(GPIO)
    local gpio_in = GPIO("/dev/gpiochip0", 26, "in")
    rbValue = gpio_in:read()
    gpio_in:close()
    return rbValue
end
This explains how I coded the buttons, but what about the RFID?
Python and Sockets
Unfortunately, there are no Lua libraries to read RFID data. So, I used Python. The Python library, mfrc522, which is build to read the RFID-rc522 RFID reader. This reader is super accessible and cheap, so if you’re planning on building an RFID-based project, this reader is a great place to start!
I could easily read and write on the RFID cards with my Python script, but how could I interact with my Lua scripts, too? I used sockets.
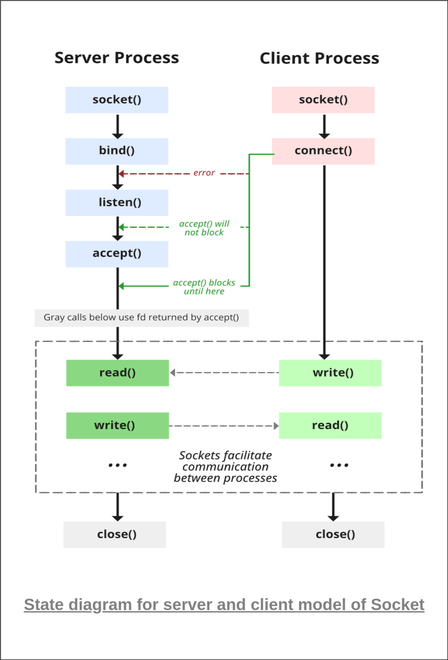
In simple terms, my Python script sends out a signal to a port saying, “is the Lua code ready for me?”
When the Lua code reaches the RFID reading part of the game, the Lua code connects to the port, saying “I’m ready to read RFID!”
Then, the Python code reads the RFID card and sends it’s data to the Lua script.
Finally, the Lua script disconnects from the socket and the transaction is over!
with socket.socket(socket.AF_INET, socket.SOCK_STREAM) as s:
    s.bind((HOST, PORT))
    s.listen()
    conn, addr = s.accept()

    with conn:
        print("connected by", addr)
        while True:
            data = conn.recv(1024).decode('utf-8').strip()
            print(data)
            if not data:
                break
            if data == "RFID":
                print("hold card to reader")
                id, text = reader.read()
                print(text)
                conn.sendall((str(text) + '\n').encode('utf-8'))
                print("sent!")
            else:
                break
Product Design
After putting all of the code and electronics together, it was time to design the case for the console!
Design Goals
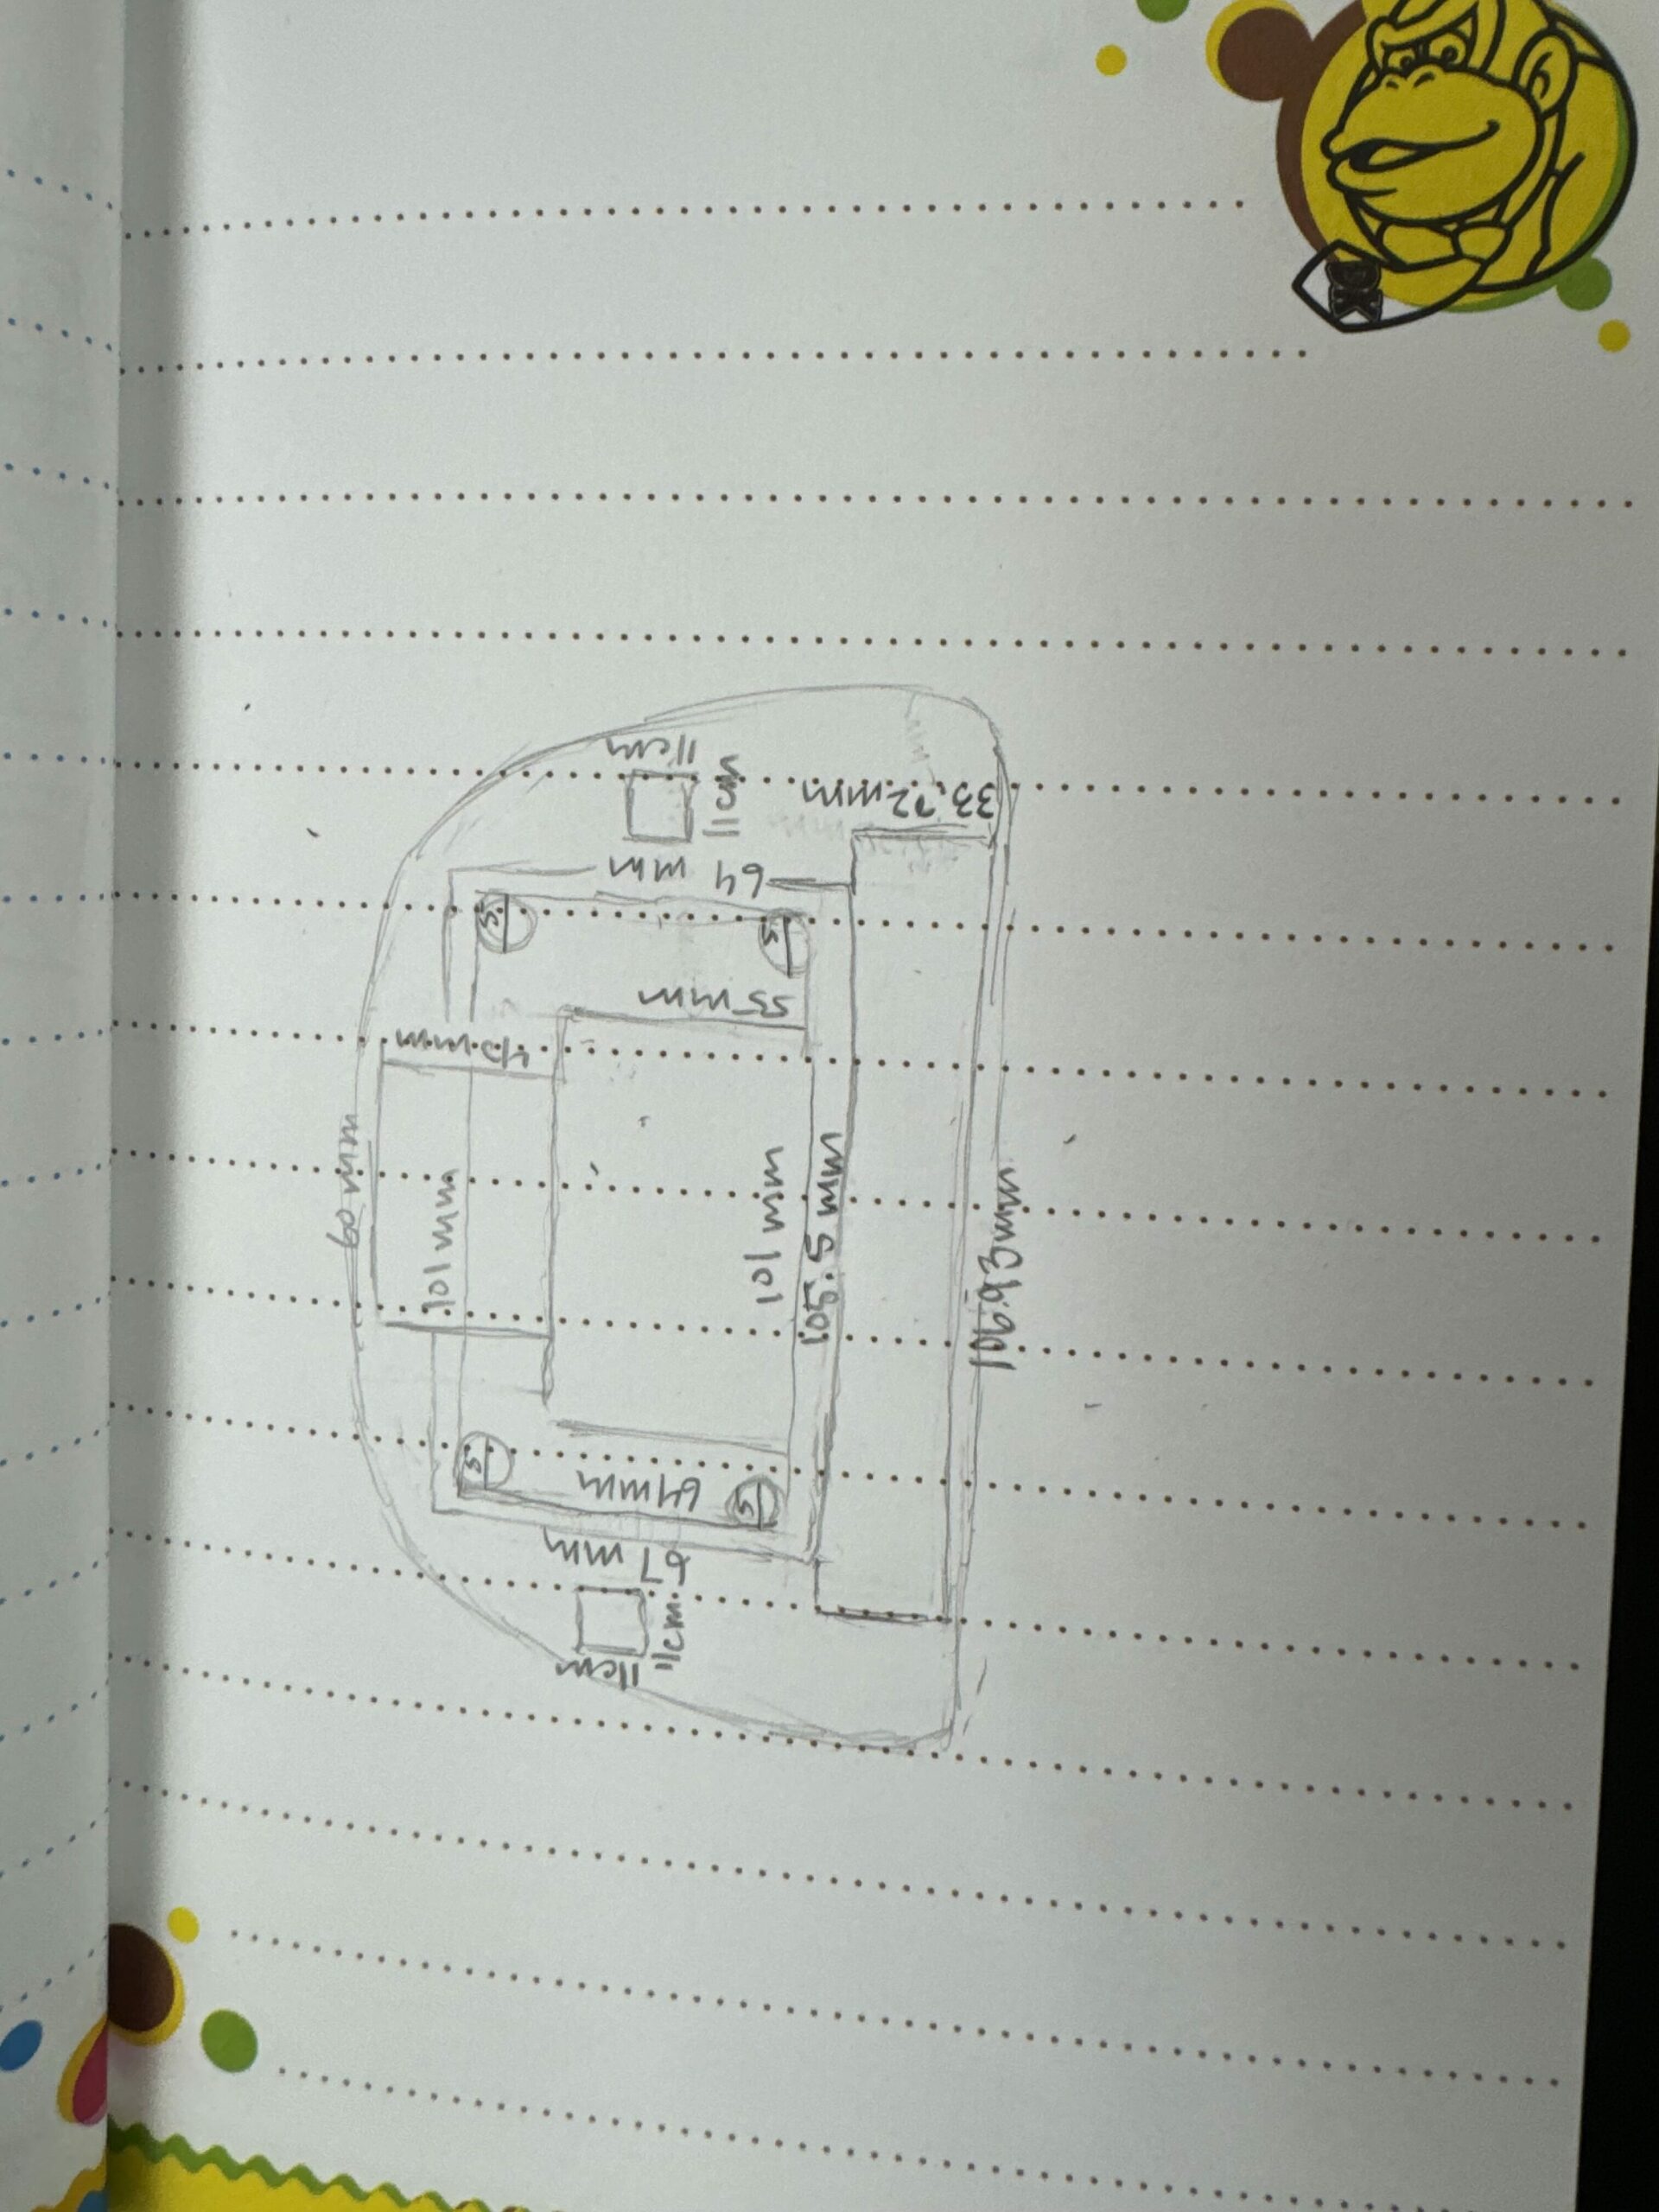
Because my target audience for my game was girls, wanted the case to be cute, pink, and as compact as possible. I started off by sketching different ways I could place each electronic component in the console.
Then, I started 3D modeling the case in Shapr3D, and printed it!
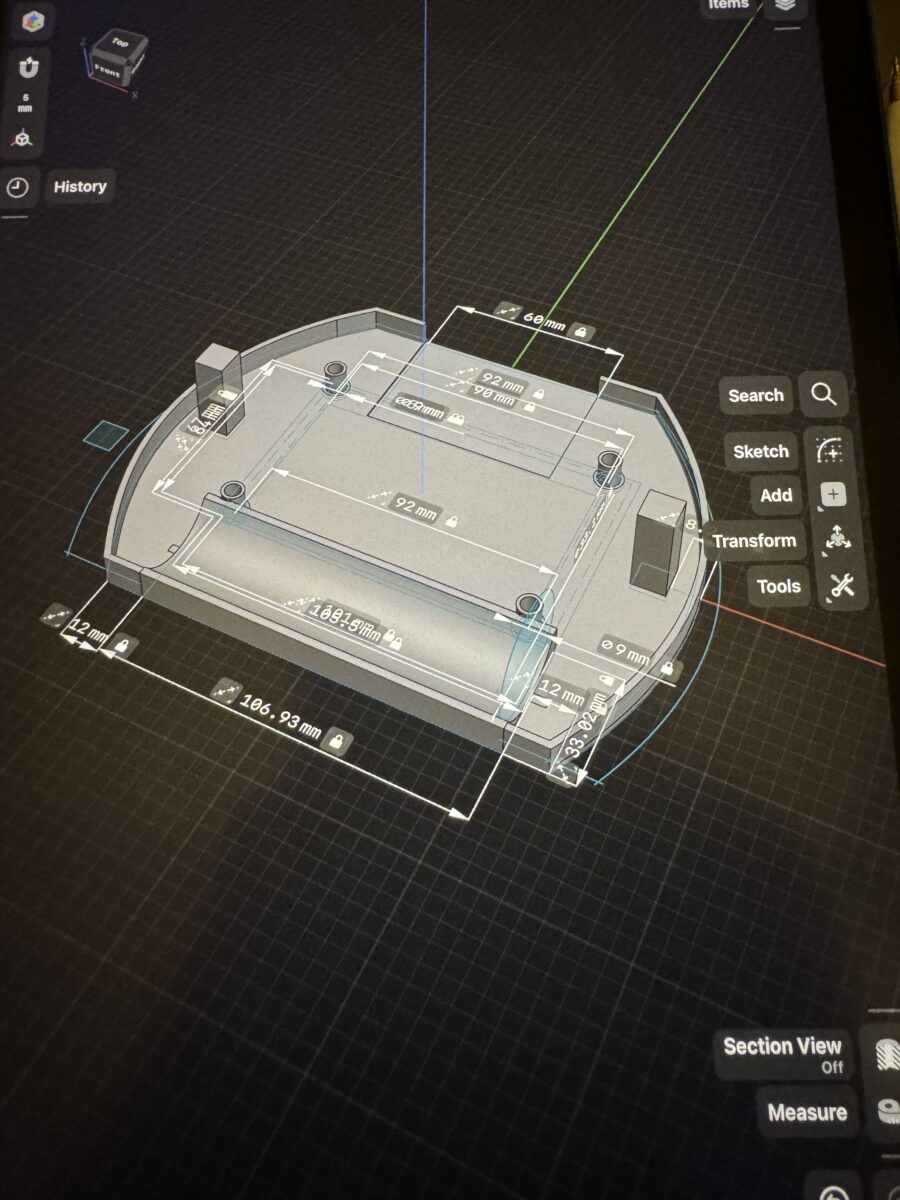
I used a gorgeous pink filament from Atomic Filament, which I highly recommend.
Ergonomics
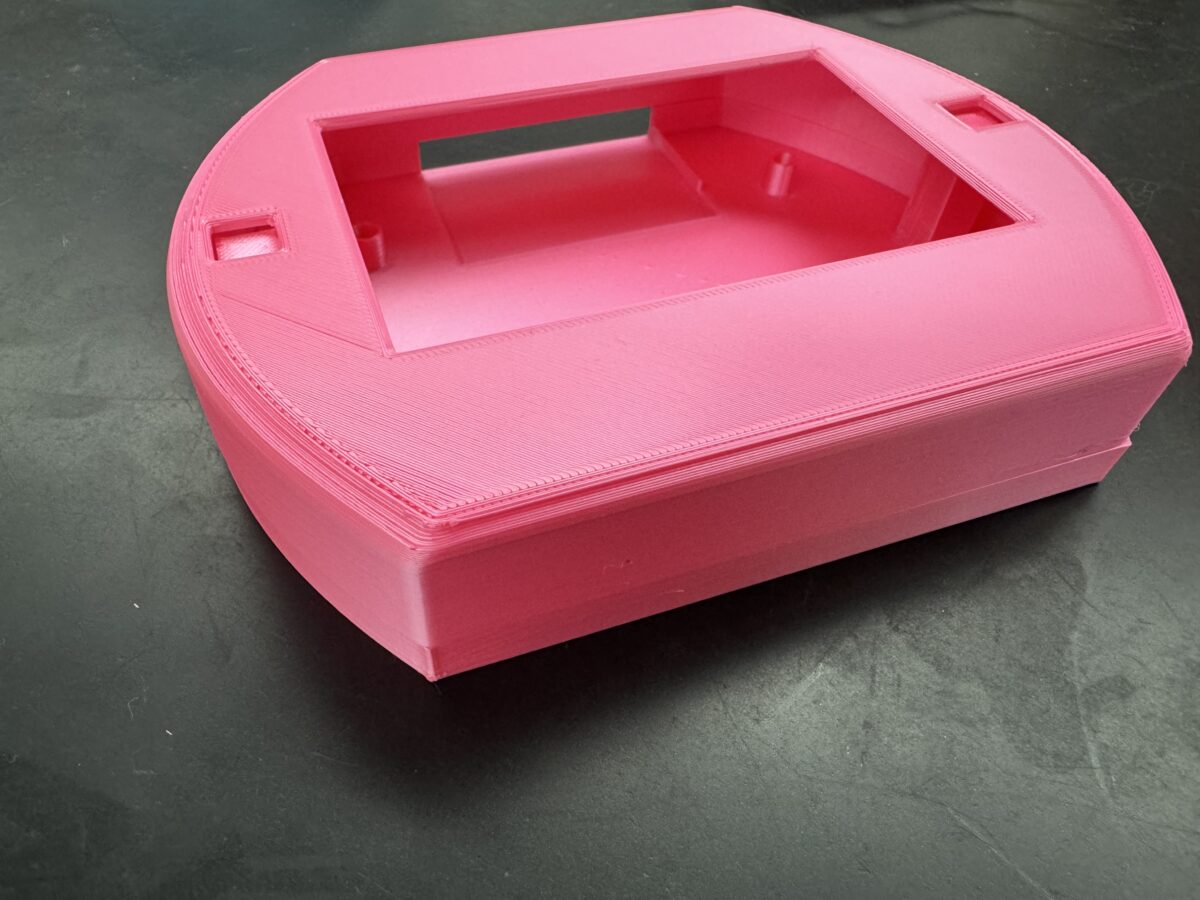
As I was designing my case, I wanted to make sure that it would be ergonomic. After experiencing carpal tunnel syndrome after playing too much Fashion Dreamer on the Nintendo Switch, I knew I didn’t want anyone to hurt their wrists while playing my game.
I decided to round the edges of the case, and make sure that the console was a comfortable thickness, so the player’s hands wouldn’t have to contort.
Buttons
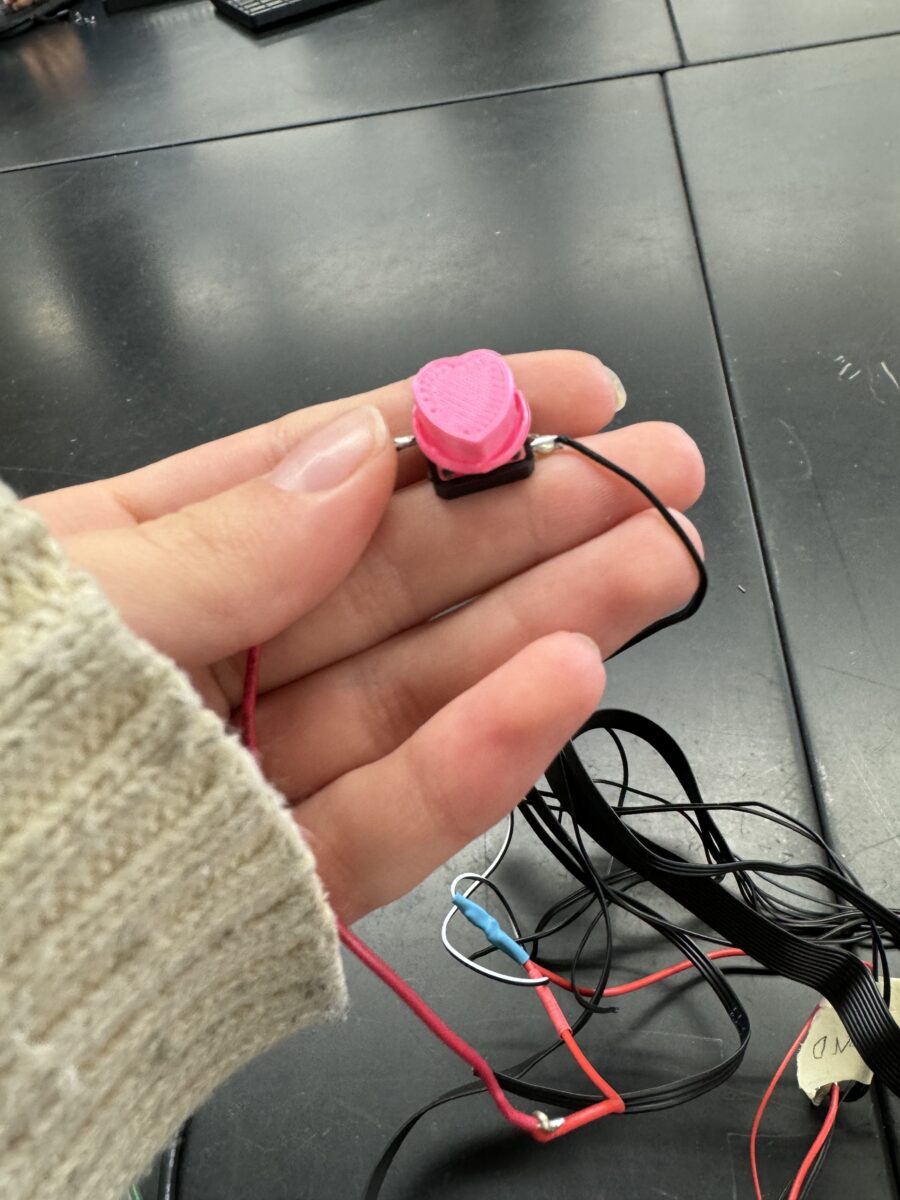
I also designed heart shaped button caps for the console.
Magnetic Closure
With the case printed, all I needed to do was close it! I modeled some small magnet holders in Shapr3D, and then hot glued some magnets into the case. That way, I could easily open up the case to see the hardware inside.
Conclusion
And with that, the project was done! I learned so much about software, hardware, game design, and product design with this game, and I hope you did too.
